
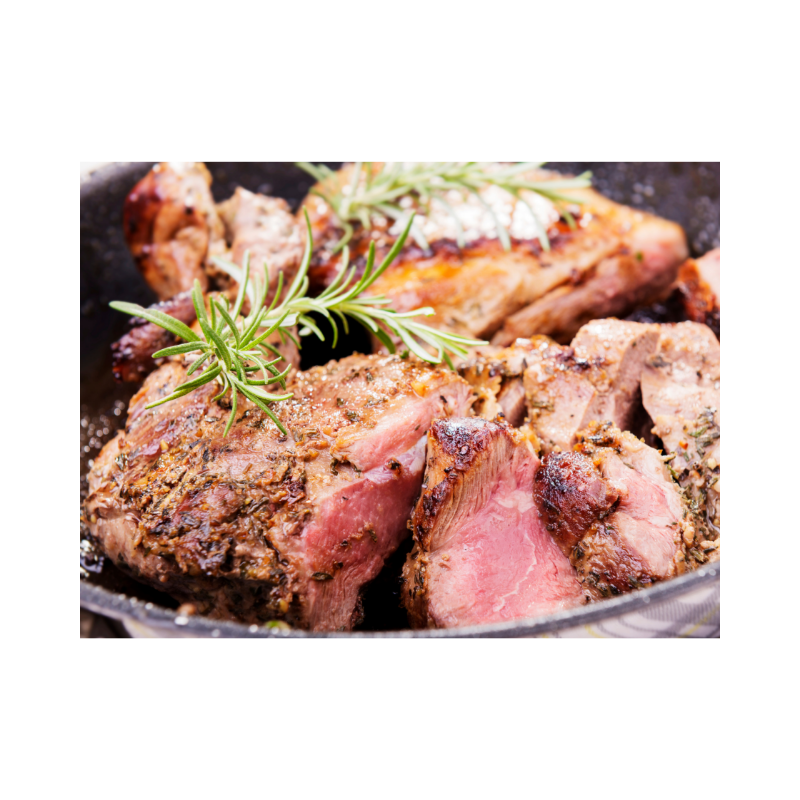
The daffodils are raising their sunny heads, the fields are greening, and Easter will be here before you know it. I'd love to share a recipe for our favorite lamb roast, and a traditional Easter favorite: leg of lamb.
It sounds complicated, but it isn't!
We had never tried lamb before we started raising them here on the farm. It's now our favorite meat....rich, tasty, and I think easier to digest than beef.
And I really wish they could come up with a different name. Lamb meat (at least here) isn't little lambs. Generally, if the animal is a year old or less, you call it lamb...in some places, two years. After that, it's called mutton. Ours are around a year old when they're processed. Just so you know and don't think you're eating a little guy. They look like full-grown sheep.
This recipe works equally well for lamb shoulder, too. I've adapted this recipe from Stanley Fishman's "Tender Grassfed Meat" cookbook. Highly recommend this book.
If you can get the ingredient quality as listed, that makes this dish even better, but I use what I have on hand, even jarred spices, and it still turns out great.
Ideally, you'll need :
1 (3 to 5 lb) leg of lamb or lamb shoulder
2 cloves organic garlic, quartered lengthwise
Marinade:
3 T. unfiltered organic extra virgin olive oil (Stanley likes Greek)
1 T. fresh organic lemon juice
2 T. sherry (optional)
1 t. coarse unrefined sea salt, crushed
1/2 t. freshly ground organic black pepper
Leaves from 4 sprigs fresh organic parsley
4 cloves organic garlic, finely chopped
1 t. dried organic oregano
4 sprigs fresh organic oregano, coarsely chopped (1 t. dried)
2 sprigs fresh organic rosemary, coarsely chopped (1/2 t. dried)
2 sprigs fresh organic thyme, coarsely chopped (1/2 t. dried)
Begin marinating the lamb 3 hours before you start cooking it. Cut 8 deep slits all over the meat and put a piece of garlic in each slit.
If you're using fresh herbs, strip the leaves from the stems...keep the stems! Finely chop the herbs and the parsley along with the 4 cloves of garlic. Place in a small bowl with the remaining ingredients, and mix to make the marinade.
Put the roast in a glass container, and coat the whole thing with the marinade. Let rest at a cool room temperature for 3 hours before roasting.
When it's time, preheat the oven to 425 degrees.
If you used fresh herbs, put the stems in a well-greased glass baking dish. Place the roast on top of the stems, meaty side down. Pour any marinade still in the container over the meat.
Roast for 15 minutes.
Reduce the heat to 300 degrees.
Baste with the pan drippings, and cook for 30 minutes.
Baste again and cook for 30 more minutes. This should give you a pink to light grey meat.
We hope this very special cut of meat will find its way to your table this spring (or any time of year).
Let us know in the comments below how you liked it!
HOW TO MAKE SUPER-DELICIOUS CORNED BEEF AT HOME
Today I’m going to teach you how you can make your very own corned beef brisket at home. This is a very easy process and involves quite a bit of waiting, but not much actual work. If you’re like me, that criteria always moves a project to the top of my list.
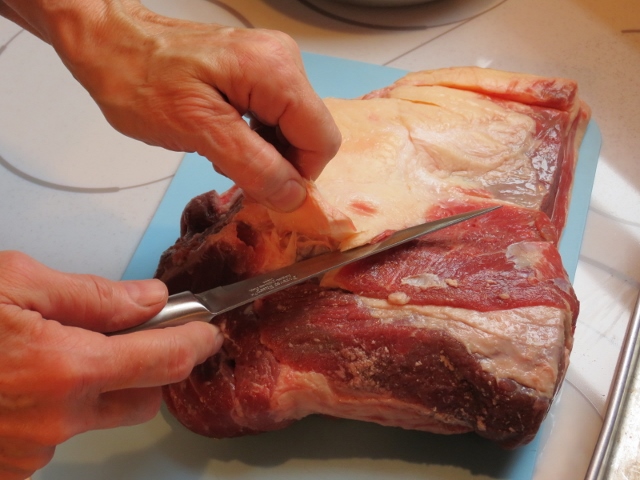
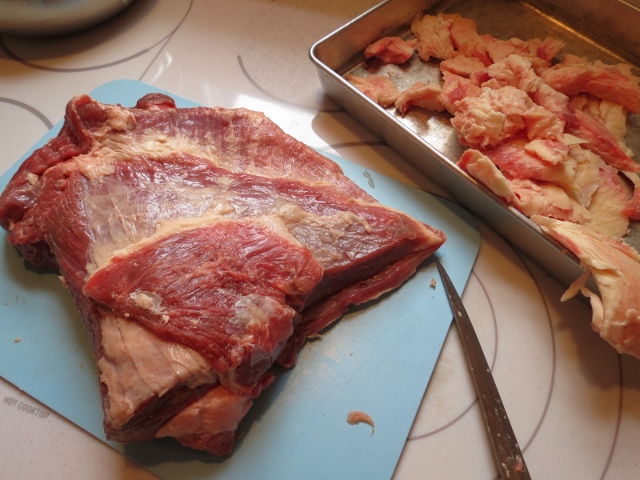
Start with a Pasture Nectar Farm grass-fed beef brisket. I always have our briskets cut in half, so they’re a manageable size, around 4 lbs. or so.
I’m going to share the recipe I use, adapted from The Complete Make-Ahead Cookbook. While I normally avoid added nitrites in meats, I make an exception for this exceptionally tender family favorite.
Starting with a flat brisket is best. The one I’m using here is a bit rounded, but I’m saving the flatter ones for you to try.
Some special items you’ll need:
Pink curing salt #1. This is a combination of table salt and nitrites. You can purchase it online or in specialty stores. It is also called Prague Powder #1 among other things.
A large Dutch oven or stock pot that can hold 7 quarts or more, and a plate that can just fit inside the pot. I use the stock pot to brine in, and a Dutch oven to cook it in since I happen to have both.
Cheesecloth and something to tie it with like kitchen twine.
Salt: I like to use Morton’s Kosher salt for this, but I increase to 1-1/8 c instead of the 3/4 c. regular salt listed.

Plan ahead! This recipe happens in 2 steps: curing the brisket which takes 6 days, and the final cooking when you get to add the traditional cabbage and potatoes on the day you’re going to eat it.
NOTE: you can do the 6-day curing part, cook the meat through Step 3 below, and then refrigerate the brisket for up to 3 more days prior to reheating and cooking the vegetables. Save the liquid!!
Let’s get going:
CORNED BEEF
1 (4.5 to 5 lb) beef brisket, flat cut
3/4 cup salt
1/2 cup packed brown sugar
2 teaspoons pink curing salt #1
6 garlic cloves, peeled (I cheat and use purchased organic minced garlic)
6 bay leaves
5 allspice berries
2 tablespoons peppercorns
1 tablespoon coriander seeds
(The spices will be divided and used in 2 separate parts, so pay attention to the written instructions in the recipe.)
VEGETABLES
6 carrots, peeled, halved crosswise, thick ends halved lengthwise
1-1/2 lbs. small red potatoes, unpeeled
1 head green cabbage (2 lbs), uncored, cut into 8 wedges
NOTE; While these are traditional veggies for corned beef, if you have picky eaters or just want a different twist from boiled fare, roast them instead! Cut any vegetables you want into small pieces, mix with oil, salt and pepper, then roast in a single layer (not touching as much as possible) at 425 degrees for 15 minutes to start. The edges should be crispy. If there isn’t enough room around the pieces, it will steam them instead. Use two pans if you need more room.
THE CORNED BEEF:
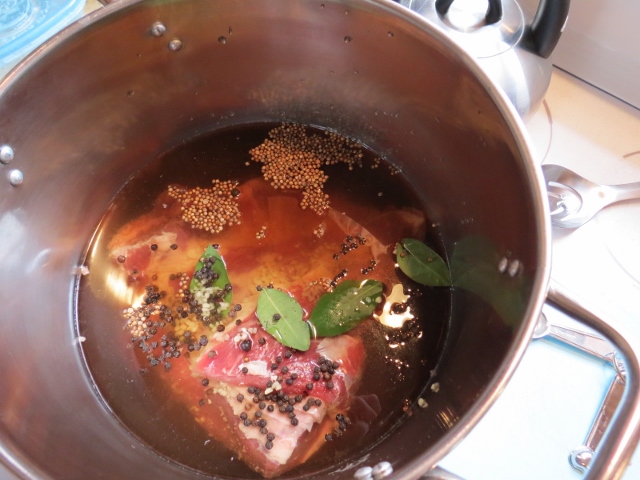
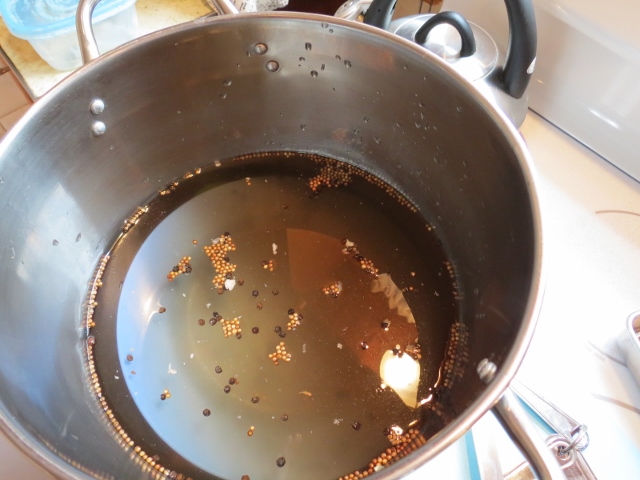
Trim the fat to 1/8 inch. You want the salts to be able to reach the innermost parts of the meat. Dissolve salt, sugar and curing salt in 4 quarts water in your container. Add the brisket, 3 garlic cloves, 4 bay leaves, all of the allspice berries, 1 tablespoon of peppercorns, and all of the coriander seeds. Use your plate to submerge the brisket (leave the plate in there), cover, and refrigerate for 6 days.
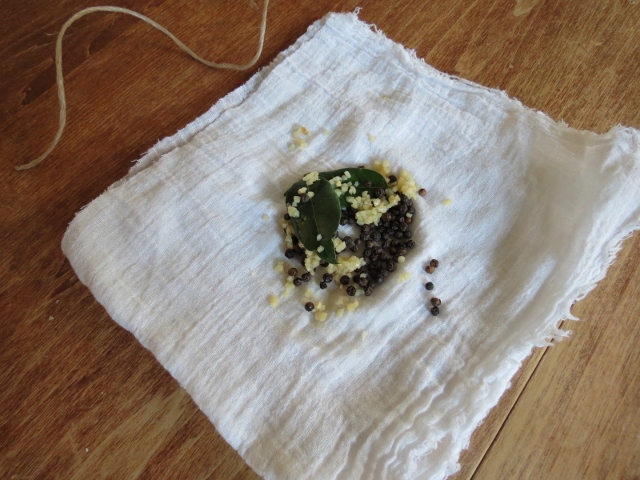
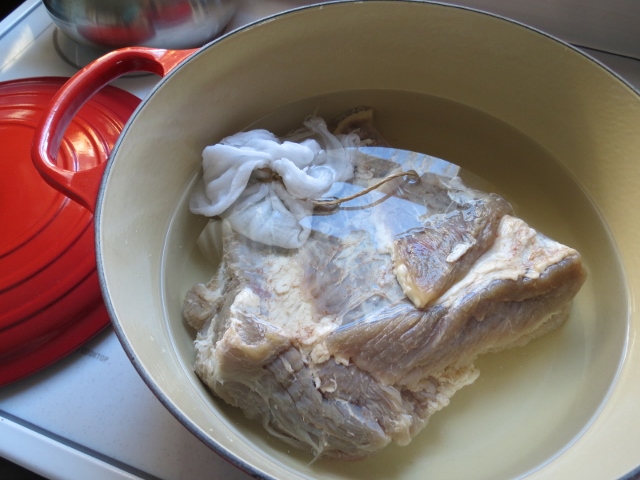
On the 7th day, put your rack in the middle position and heat oven to 275 degrees. Remove the brisket from the brine, rinse, and pat dry. Cut an 8-inch square triple thickness of cheesecloth. Now take the remaining spices (3 garlic cloves, 2 bay leaves, and 1 tablespoon peppercorns), place in the middle of the layers of cheesecloth, and tie it in a bundle with twine. Put the brisket, the spice bundle and 2 quarts of water in a Dutch oven or stock pot. The brisket might not lay flat, but it will shrink as it cooks.
Bring to a simmer over high heat, then cover and transfer to the pre-heated oven. Cook until the meat is tender and a fork slips easily in and out of the meat, approx 2-1/2 to 3 hours.
Remove from the oven, and transfer the brisket to a large platter, ladle a cup of cooking liquid over the meat, and return to the oven to keep warm. Turn off the oven!
THE VEGETABLE PART
Add the carrots and potatoes to the pot and bring to a simmer over high heat. Reduce to medium-low, cover, and simmer until vegetables begin to soften, about 7 to 10 minutes. Add the cabbage to the pot, increase the heat to high, and return it to a simmer. Now reduce the heat to low, cover again, and simmer until all the vegetables are tender, 12 to 15 minutes.
While the veggies are cooking, you can transfer the brisket to a cutting board and slice against the grain into 1/4-inch thick pieces. Slicing against the grain of meat makes it more tender to chew. Yes, it’s a thing.
Return the beef to the platter. Transfer the vegetables to the platter using a slotted spoon, and moisten all with additional broth.
If you refrigerated the brisket after you cooked it through Step 3, you can slice it now, place in a 13x9 baking dish, pour 1 cup of the liquid over the meat, cover with foil, and reheat it in a 350-degree oven for 30 minutes. Bring the remaining cooking liquid to a simmer and continue on with the vegetable part above, or roast your vegetables instead.

I hope you enjoy this traditional dish as much as we do!
What St. Patrick’s Day or spring traditions does your family enjoy? Share with us in the comments!
4 Yummy Holiday Recipes To Make With Milk: A Collaboration with Askinosie Chocolate
It’s Christmastime…
And that means we’re turning to indoor activities and cozy evenings. With colder weather, we’d like to feel snuggly and warm. We start making stews and soups and hot drinks.
With the holidays approaching, things get busy. Sometimes you might have extra milk because you’re so busy running to concerts, practices, and shopping for gifts that you’re just not there to drink it.
Here are some fun warm and holiday things you can do with Pasture Nectar milk, whether you have too much or not.
Our customer Shawn Askinosie of Askinosie Chocolate fame has graciously allowed me to share some hot cocoa recipes with you, including his personal favorite. Marrying Pasture Nectar Farm milk and Askinosie chocolate makes for one sweet cup of delicious winter warmth! Of course, you have to heat the milk which means it’s not raw anymore, but you have to do what you have to do. Just don’t boil it!

Photo by Alisa Anton on Unsplash
HOT COCOA - Better and Best
The cocoa recipes are adapted from Reina Leber of Zingerman’s Deli in Ann Arbor, MI:
Better Than Average
Ingredients:
2 tbsp. Askinosie Cocoa Powder
10 oz hot Pasture Nectar Farm milk (160 degrees. Do not boil) 2 tbsp. sugar
Directions:
Mix the cocoa powder and sugar. Slowly stir or whisk in the hot milk. Makes 2–6 servings.
The Best
Ingredients:
2 tbsp. Askinosie Cocoa Powder 6 oz Pasture Nectar Farm milk (160 degrees. Do not boil) 2 tbsp. Demerara sugar ( OR 1 tbsp. white sugar, 1 tbsp. brown sugar)
1 pinch sea salt
Directions:
Mix the cocoa powder, sugar and salt. Slowly stir or whisk in the hot milk. Makes 2 servings.
2. Shawn’s Personal Favorite Hot Cocoa
This from Mr. Chocolate himself:
“My personal recipe for one large mug:
-- Pasture Nectar Farm milk :)
-- whisk until warm
-- add 2 heaping tsp of our natural cocoa powder [we were the first in the US to make it small batch]
-- add 3 squares of any of our dark chocolate bar that I have on hand (Kathy's note: try one of their brand-new Dark Chocolate Peppermint bars. Oh, mercy!)
-- now that it's hot I whisk the you know what out of it to really build the body up; sometimes if I am being lazy I will use a home immersion stick blender
-- dash of sea salt
that is it
you notice - no sugar added - why? Because of the flavor of the milk and the actual chocolate which has some bit of sugar in it
that is just my personal fav
Shawn”
3. Eggnog from Scratch
You’ll wow your family and friends when you make this easy eggnog recipe for the holidays (or anytime). You will definitely be able to tell this is NOT store-bought eggnog. Made at home with love!
Recipe adapted from Tastes Better From Scratch
Makes about 3.5 cups
Ingredients:
6 large egg yolks
1/2 cup granulated sugar
2 cups Pasture Nectar Farm milk
1 cup heavy whipping cream (from the farm if you can get it)
1/2 teaspoon ground nutmeg
pinch of salt
1/4 teaspoon vanilla extract
ground cinnamon, for topping
Instructions:
Whisk the egg yolks and sugar together in a medium bowl until light and creamy.
In a saucepan over medium-high heat, combine the cream, milk, nutmeg and salt. Stir often until mixture reaches a bare simmer.
Add a big spoonful of the hot milk to the egg mixture, whisking vigorously. Repeat, adding a big spoonful at a time, to temper the eggs.
Once most of the hot milk has been added to the eggs, pour the mixture back into the saucepan on the stove.
Whisk constantly for just a few minutes, until the mixture is just slightly thickened (or until it reaches about 160 degrees F on a thermometer). It will thicken more as it cools.
Remove from heat and stir in the vanilla.
Optional: to use the egg whites in this recipe, rinse the yolk residue out of your mixer and beat until stiff peaks form. Fold into the eggnog. Or use them in a different recipe.
Pour the eggnog into container of choice and cover with plastic wrap.
Refrigerate until chilled. It will thicken as it cools. If you want a thinner, completely smooth consistency, you can add the entire mixture to a blender with 1 or 2 tablespoons of milk and blend until smooth.
Serve with a sprinkle of cinnamon and fresh whipped cream, if desired.
Store homemade eggnog in the fridge for up to one week.
Hey, where’s the Askinosie in the eggnog?
Oh. You were paying attention.
Good for you! That’s how you keep your farmers on their toes.
BONUS TWEAK:
Make whipped cream (use Pasture Nectar cream if you can get your hands on some), dollop some on the top of the eggnog (or the hot cocoa), and finish off with a few grates of any Askinosie chocolate bar.
WITH A TWIST:
Substitute 1/2 t. peppermint extract for the vanilla extract in the eggnog recipe, and grate some chocolate into the eggnog while cooking for a delicious peppermint patty variation. Garnish with small candy canes.
HOW ABOUT THIS?
Add rum extract instead of the vanilla extract, or keep the vanilla extract in and add 1 T. of a high-proof alcohol. Brandy and rum are traditional favorites. I’ve seen recipes that call for as much as 1.5 CUPS of alcohol for this recipe. I’d start with 1 T. and go from there.
4. HOLIDAY PEPPERMINT PUNCH
For a fun party drink all ages can enjoy, put peppermint ice cream in a punch bowl and pour eggnog over it. Pour Sprite over all. You can decorate the sides of the bowl with candy cane stir sticks for a fun look.
Have tons of fun making and enjoying these drinks with your family and friends this holiday season and throughout the winter. Actually, if you have milk, cream, eggs and sugar on hand (and Askinosie chocolate), you can enjoy eggnog and hot cocoa any time of year.
Thanks again to Shawn and the team at Askinosie Chocolate in Springfield.
Disclaimer: the farm doesn’t get anything from Askinosie for promoting their products; just one small business helping another, and keeping food production (and consumption) local, except for the cocoa beans. Shawn is able to help many hard-working folks in other countries get more than a fair price for their goods with his Direct Trade program. Love this!
If you go off to look at Askinosie Chocolate, don’t forget to come back here and make these yummy drinks. I’d love to hear how they turned out for you, and any tweaks you decided to try.
Cheers!
THE PUFFIEST PUFF PANCAKES EVER
Don’t let the name fool you. These pancakes love being served as dessert as well as at breakfast.
Each recipe makes 1 pie plate full. (Hog alert: we make 4 at a time, and eat almost all of them at one sitting.)
When you double, triple or even quadruple the recipe like we do, it’s a great way to use up eggs.
This is such a fun, easy recipe to make with children. Call your kids to the oven to watch the show when you open the door. It’s impressive!

o 2 T. butter
o 2 Pasture Nectar Farm eggs
o ½ c. Pasture Nectar Farm milk
o ½ c. all-purpose flour
o 2 T. sugar
o 1/8 t. cinnamon (we leave this out)
Preheat the oven to 425 degrees.
Place the butter in a 9-inch pie plate, and put it in the pre-heated oven for 4 to 5 minutes until melted.
In the meantime, whisk together the eggs and milk in a bowl.
In another bowl, combine the flour, sugar (and the cinnamon if you’re using it). Whisk in the egg mixture until smooth.
Pour into the pie plate, and bake for 18-22 minutes or until the sides are crispy and golden brown.
Get everyone at the oven when you open it because when the cool air hits them, they’ll start to shrink.
You can serve this with a fruit sauce. You could even experiment with cutting back on the sugar and using a fruit spread or honey as the sweetener. I think this would be terrific with ice cream. Enjoy!
- This recipe adapted from the Taste of Home Breakfast Cookbook, 2009.
FIT FOR A KING POT ROAST
Have you ever had that experience where you smell something, and a person or a place pops into your mind? Smells are a really good prompter of memory. One of my favorite smell memories is walking into my grandma's kitchen when she was cooking a pot roast.
Grandma was a great cook.
Of course, it wasn't just about the good meal I knew was coming but the whole 'I love grandma's house' thing.
I'm willing to bet you've got some good grandma memories, too.
I still love a good pot roast, and we all need everyday recipes that work consistently and aren't fussy so we can spend more time with our families.
I've got one here for you....
This is a pretty simple recipe that uses grass-fed roasts which need to be braised (basically, cooked in liquid). In other words, the less expensive parts of the steer which will save you money.
I've adapted this recipe from Lynne Curry's Pure Beef cookbook (Running Press Publishers, 2012). I decided to add garlic and cooking sherry to change the flavor profile. The sauce I got was delicious! I didn't even have to make gravy; just spooned it over the shredded beef and vegetables at the table.
Now...if only I could have found a way to generate a smell that would make the multiplication tables pop right into my children's heads, I could have made a million bucks.
FIT FOR A KING POT ROAST
1 (3 to 3.5 lb) boneless Pasture Nectar Farm chuck roast
Kosher salt, some pepper
3 T. oil (preferably coconut oil or butter)
1 medium onion, chopped or cut into 1/2-inch wedges
2 cloves garlic, minced
3 T. flour (your choice of gluten-free OK)
3 c. beef stock with the fat if you have it (I used poultry and lamb)
1 T. Worcestershire sauce or organic shoyu
1 t. salt
1/4 t. black pepper
1/2 t. dried thyme leaves (or 1 t. fresh)
2 bay leaves
1/4 c. cooking sherry (the alcohol will burn off)
3 large carrots, peeled
2 lbs potatoes (or add other root veggies as you like such as parsnips)
Let the roast come to room temp for a couple of hours.
Preheat the oven to 275 degrees. Pat the roast dry and season both sides with kosher salt and pepper. Melt the oil in a large Dutch oven or oven-ready pot over medium-high heat, and sear the roast on both sides when the oil starts to shimmer. This gives another depth of flavor to your finished meal.

Give each side about 4 or 5 minutes at least. You want a nice deep brown color but you don't want to cook the meat inside very far.
When seared, remove the roast to a plate. Reduce heat to medium and add the onion and garlic; cook, stirring, until onions are translucent, about 5 minutes or so. Now add your flour and stir until it's absorbed.
Stir in the stock and Worcestershire or shoyu sauce. Use your spoon to scrape those yummy browned bits off the bottom of your pan for added flavor.
When it comes to a boil, add the salt, pepper, thyme, cooking sherry and bay leaves along with the beef plus the juices from the plate it was on. Don't waste any of that good taste!
Cover the pot with a good-fitting lid and put it in the oven for 2-1/2 hours.
Cut your vegetables as you like (I like to cut the potatoes into 1- or 2-inch pieces, and the carrots into 1 inch pieces, and slice the small ends. I think smaller pieces take up the flavor of the sauce better without giving you that 'pot roast vegetable' taste; you do remember that taste, right?)
Turn the roast over and put the vegetables in the liquid around the meat. Cover again, and bake for another 1-1/2 to 2 hours, or until the beef shreds easily with a fork, and the vegetables are very tender.

See that great sauce? You can separate the natural chunks of the roast or shred it. We served it in a bowl, like stew, or you can put the meat and vegetables on a platter, and serve the sauce on the side.
Some reserved sauce over rice makes a great side dish for another meal.
We have plenty of chuck roasts in the farm store right now. Our rump and sirloin tip roasts would work, too.
Feel free to forward this to a friend, and let me know how it turns out for you!
Best,
Kathy